Career opportunities with a ceramics emphasis include:
- creative consultant
- prototype designer
- business owner
- artist
- arts administrator
Studio Art, Bachelor of Fine Arts
- Available Emphasis Areas:
- Ceramics - Emphasis
- New Media - Emphasis
- Painting - Emphasis
- Printmaking - Emphasis
- Sculpture - Emphasis
This degree takes advantage of NAU’s studio facilities to accustom students to working in studio environments. Students will learn important techniques, analysis of materials, planning, critique, global influences, and more.
Requirements Accordion Open
To receive a bachelor's degree at Northern Arizona University, you must complete at least 120 units of credit that minimally includes a major, the liberal studies requirements, and university requirements as listed below.
- All of Northern Arizona University's diversity, liberal studies, junior-level writing, and capstone requirements.
- All requirements for your specific academic plan(s).
- At least 30 units of upper-division courses, which may include transfer work.
- At least 30 units of coursework taken through Northern Arizona University, of which at least 18 must be upper-division courses (300-level or above). This requirement is not met by credit-by-exam, retro-credits, transfer coursework, etc.
- A cumulative grade point average of at least 2.0 on all work attempted at Northern Arizona University.
The full policy can be viewed here.
Overview Accordion Closed
In addition to University Requirements:
- 84 units of major requirements which include 27 units of emphasis requirements.
- Note that PHO courses, ART 100, ART 101 and ART 300 do not fulfill the requirements of the BFA major.
- Up to 9 units of major prefix courses may be used to satisfy Liberal Studies requirements; these same courses may also be used to satisfy major requirements.
- Elective courses, if needed, to reach an overall total of at least 120 units.
Students may be able to use some courses to meet more than one requirement. Contact your advisor for details.
| Minimum Units for Completion | 120 |
| Highest Mathematics Required | MAT 114 |
| University Honors Program | Optional |
| AZ Transfer Students complete AGEC-A | Recommended |
| Progression Plan Link | View Progression Plan |
| Emphasis Required | An emphasis is required for this major. |
Purpose Statement
The Bachelor of Fine Arts in Studio Arts degree encompasses knowledge, skills, and dispositions that are in demand from an array of creative fields—including but not limited to medical, entertainment, and design—in addition to the skills needed to be studio artists. Studio artists work in a variety of different occupations that require a combination of hand skills, an understanding of a variety of material applications, and creative problem solving. Upon graduation, students are expected to exhibit the strong critical thinking, aesthetic design, and conceptual thinking skills needed to participate effectively in a competitive creative arts market.
Beyond the skills of artistic creation, students develop business practices for artists including graduate school application, grant application, gallery representation, self-promotion through web and print media, and maintaining a sustainable and safe studio practice. Studio Arts students learn how to apply their skills beyond traditional studio art applications to other industrial and non-industrial fields outside the world of art.
School of Art faculty teach students to apply critical thinking and analysis, innovation and creative solutions, as well as technical artistic processes towards the production of art while building an open mind to criticism respect for public opinion. All Studio Arts majors are required to complete a Foundation year which includes drawing and basic 2D, 3D, and 4D design coursework. Eventually, students work primarily in one of five emphases: Ceramics, New Media, Painting, Printmaking, or Sculpture. Courses are studio-based and include classroom critiques and discussions about work produced in class, review of professional artwork and artists, and professional practices of an artistic practice. Each Studio Arts student works towards a senior thesis which reflects the student’s experiences and research the student has completed throughout the program.
Emphases Learning Outcomes
Ceramics:
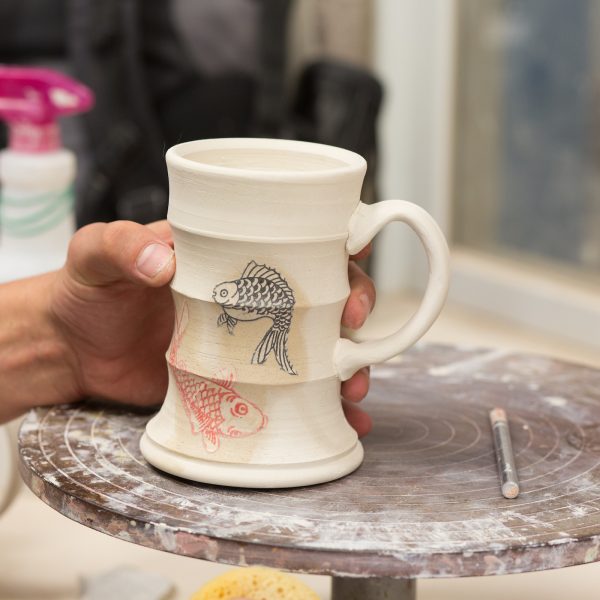
Through a detailed curriculum, students learn all of the making and firing processes in ceramics, to understand sound craftsmanship, and to think critically in design decisions. The curriculum also provides a thorough education in the technical aspects of ceramics, such as an understanding of ceramic materials through glaze calculation and the practical knowledge of kiln design and construction.
New Media Art
A New Media student’s education focuses on 4D design and the applications of technology to create artwork. Students learn how to synthesize content, processes, and components to express compelling purpose, story, emotion, or ideas in a variety of media including but not limited to performance art, installation, interactive programming, and video. The work created in this program focus on personal research reinforced by additional electives outside of the School of Art to allow more in-depth interdisciplinary exploration.
Painting:
Building upon the drawing and design skills learned in the Foundations program the painting program focuses on the application of pigment to a surface. Students begin their learning with representational approaches and over time work towards a personal expressive manner of painting that can be as unique as the student. Students explore both water and oil based painting processes as well as a variety of methods of application of paint.
Printmaking:
Building upon the observational and design skills learned in the Foundation program, students in the printmaking program explore a variety of different image making technique including but not limited to lithography, intaglio, silk-screen, wood cut, and bookmaking. What distinguishes the Print Making program from the other emphases is the focus on multiple copies of images.
Sculpture:
The BFA Sculpture emphasis focuses on 3D physical and spatial design. Students begin with learning basic metal working and welding techniques. Over time students also learn to create 3D artworks with wood, cast metal, plastics, and other composite materials. Students develop their building and fabrication skills in service of developing 3D art. These skills can be applied in a variety of occupations and opportunities like architectural theming and product prototyping in addition to studio art
Student Learning Outcomes:
- Create original two-dimensional, three-dimensional and/or four-dimensional fine artwork utilizing the elements and principles of design.
- Develop critical, creative and thinking and problem-solving strategies in visual, written and oral communications.
- Articulate between Western and Non-Western traditions of art, design and culture as well as connections of artworks to critical art theory, environmentally sustainability, global engagement and cultural diversity.
- Prepare professional marketing and business materials including written, visual and web portfolios for career opportunities including exhibitions, grant funding, art residencies, graduate studies and other discipline specific opportunities.
- Create a safe and sustainable studio practice applicable to their chosen emphasis and their creative practice
- Compare where their work fits into the global art community in terms of historical movements and contemporary practices.
- Design a research and creative practice or study of personal interest and importance utilizing all of the design phases ( planning, prototyping, evaluating, editing, and execution)
Ceramics Emphasis Learning Objectives
- Possess knowledge and skills in the use of basic tools, techniques, and processes related to raw materials and technical procedures such as clay bodies, glaze calculation, and firing so that the artwork created can be (4) conceptualized and completed in a professional manner
- Display through their completed work an essential comprehension of the industrial applications of ceramics techniques.
New Media Art Learning Objectives
- Create digital 2D, 3D, and 4D artwork with a variety of different programs and new technologies
- Program interactive and kinetic artwork which also possess electromechanical functionality
- Apply 4D design skills as they apply to performance, installation, interactive, and other new media artwork
Painting Learning Objectives
- Employ basic tools, techniques, and processes, including paints and surfaces, to work from concept to completed product.
- Develop the expressive possibilities of various media.
Printmaking Learning Objectives
- Create finished works of art that demonstrate an understanding of basic tools, techniques, and processes in printmaking, including intaglio, relief, lithography, silkscreen, and digital processes.
- Demonstrate the ability to both experiment with technical innovation and to explore and develop personal concepts and imagery in one printmaking technique.
Sculpture Learning Objectives
- Apply the knowledge and skills of hand and power tools, foundry, welding, plastics, resin, and other technologies to create 3D sculptural works of art.
- Create finished works of art that show understanding of 3D design skills that explore personal concepts and imagery.
Details Accordion Closed
Major Requirements
This major requires 84 units distributed as follows:
- Studio Art Common Course Requirement: 33 units
- Elective Track Requirement - Select two: 24 units
- Ceramics Track
- New Media Art Track
- Painting Track
- Printmaking Track
- Sculpture Track
- Emphasis Requirement - Select one: 27 units
- Ceramics Emphasis
- New Media Art Emphasis
- Painting Emphasis
- Printmaking Emphasis
- Sculpture Emphasis
Take the following 57 units with a Grade of "C" or better in each course:
Studio Art Common Course Requirement 33 units
- ARE 330W which meets the junior-level writing requirement (3 units)
- Select one from the following (3 units):
- Select two from the following (6 units):
- Select five courses from the following (15 units)*:
- ART 415 (3 units)
- Select from the following (3 units):
- One 200 or 300-level ARH elective
- MST 460
*Students completing the Painting Emphasis or Painting Track must take ART 122. Students completing the New Media Art emphasis or the New Media Art track must take ART 174
Elective Track Requirement - Select two of the following elective tracks (24 units)
The two elective tracks selected below must differ from your emphasis.
Ceramics Track (12 units)
New Media Art Track (12 units)
- Select four courses from the following (12 units):
Painting Track (12 units)
Printmaking Track (12 units)
- Select one from each of the following (3 units)
- Select one from each of the following (3 units)
- ART 342, ART 442 (6 units)
Sculpture Track (12 units)
Emphasis Requirements - Select one (27 units)
Select an emphasis that differs from either of the elective tracks chosen above.
Painting Emphasis* (27 units)
- Painting Coursework (15 units):
- ART 482C which meets the senior capstone requirement (3 units)
- Select additional units from the following (9 units)
Printmaking Emphasis (27 units)
- Printmaking Coursework (21 units)
- ART 482C which meets the senior capstone requirement (3 units)
- Select additional ART studio elective coursework with advisor's approval (3 units)
Sculpture Emphasis (27 units)
General Electives
Additional coursework is required if, after you have met the previously described requirements, you have not yet completed a total of 120 units of credit.
You may take these remaining courses from any of the academic areas, using these courses to pursue your specific interests and goals. You may also use prerequisites or transfer credits as electives if they weren't used to meet major, minor, or liberal studies requirements.
We encourage you to consult with your advisor to select the courses that will be most advantageous to you.
Additional Information
You must have completed all of the coursework used to fulfill these requirements within the last 10 years.
Be aware that some courses may have prerequisites that you must also successfully complete. For prerequisite information, click on the course or see your advisor.


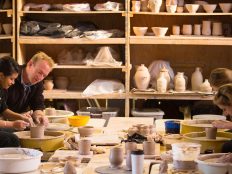
Ceramics emphasis
Model your future!
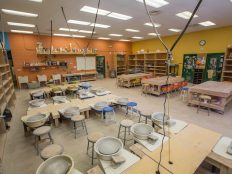
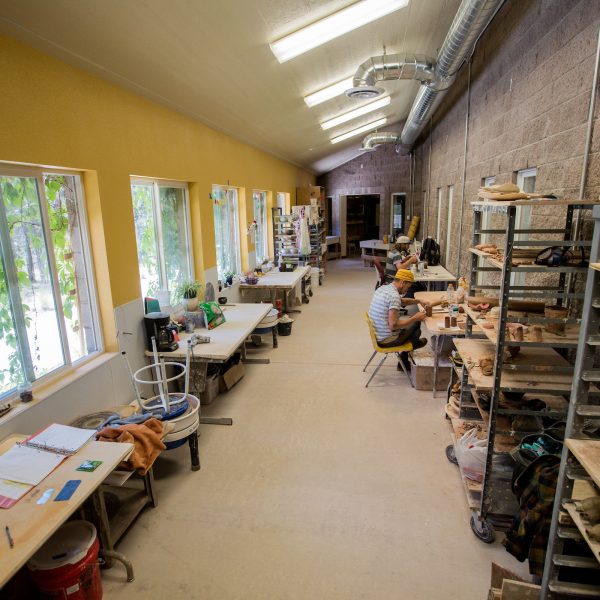
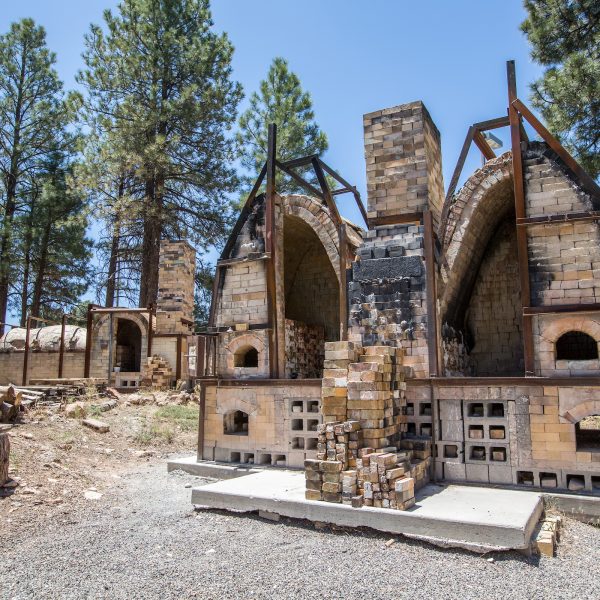
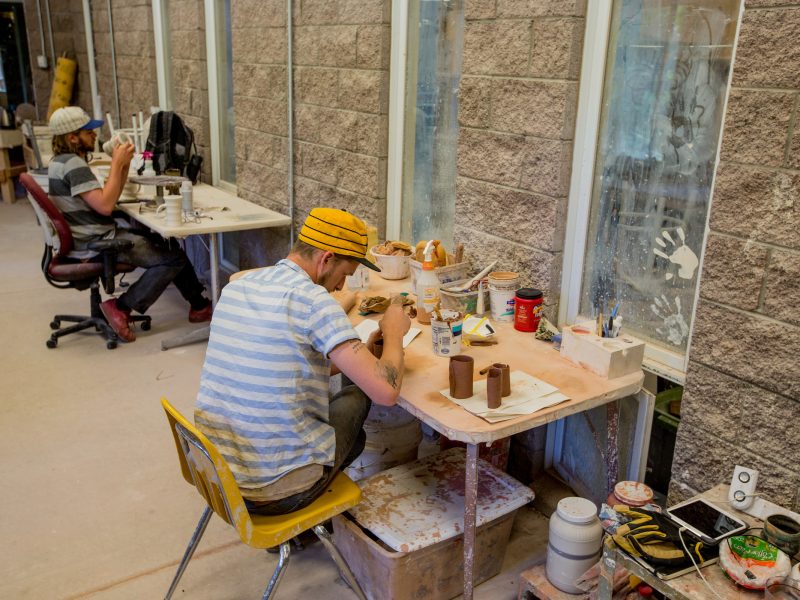
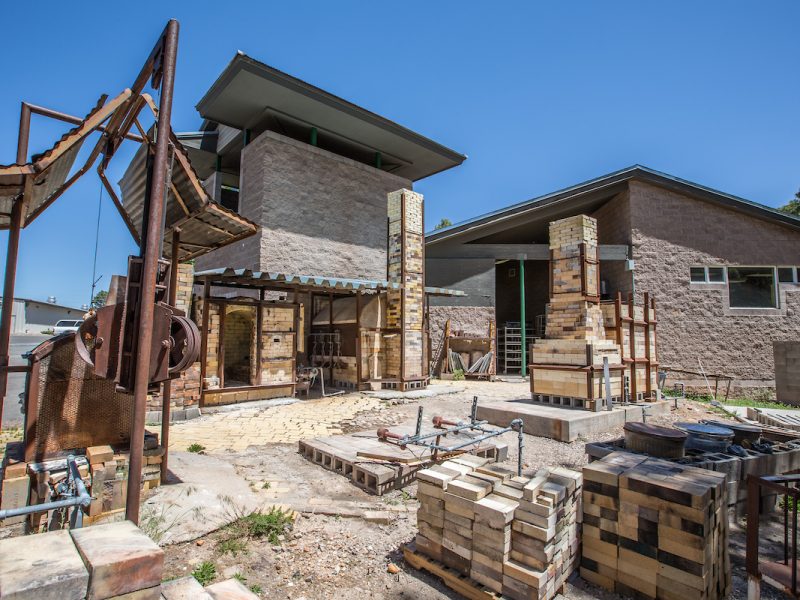
Our internationally acclaimed ceramics program is an ideal place to mold your creative impulse. You’ll learn traditional and avant-garde techniques and firing processes from working faculty artists and renowned visiting artists at one of the largest wood-fired kiln facilities in the country. With a 10,833 square-foot main studio complex on more than three acres featuring seven kilns—including one of only three Tozan kiln sites in the world—you can confidently explore your unique artistic vision.NAU’s studio art program allows you to flourish in your chosen medium. By developing a sophisticated understanding of art principles and polishing your technical skills, your education will prepare you to leave your own vibrant, expressive mark on the world. Just as importantly, you will expand your future opportunities by learning business practices for artists, including grant applications, gallery representation, self-promotion, and maintaining a sustainable and safe studio. The arts are everywhere.With an NAU BFA, you are poised to apply your studio art knowledge in many settings.Studio features
- 24 electric pottery wheels, 36” slab roller, and 6 electric kilns
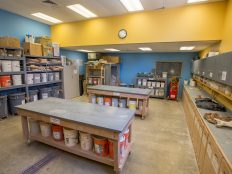
- Extruder, spray booth, ball mill
- Soldner clay mixer and Peter Pugger clay mixer
- Venco de-airing pug mill and ventilated glaze room
- Photo room with lightbox and backdrop
- 4 gas kilns (Geil downdraft/Car kiln downdraft/Laguna updraft/Reduction cool gas test)
- Outdoor kiln pad for atmospheric firings (salt,soda, raku)
- Wood kiln facility with Tozan, Anagama and Noborigama kiln sites, plus double catenary arch wood/wood-soda, small anagama, train, and double-wide train kilns
Creative space
- a 10,833-square-foot main studio complex
- two outdoor kiln areas
- a newly built clay mixing and dry materials storage building
- a traditional Japanese tea house